- Overview
- Who Will Do What?
- Plugins, Fees, Licenses, and Keys?
- Prepare your Request for the Events Feature
- Determine and Configure Event Settings
- Populate the Event Taxonomies
- Adding Events
Overview
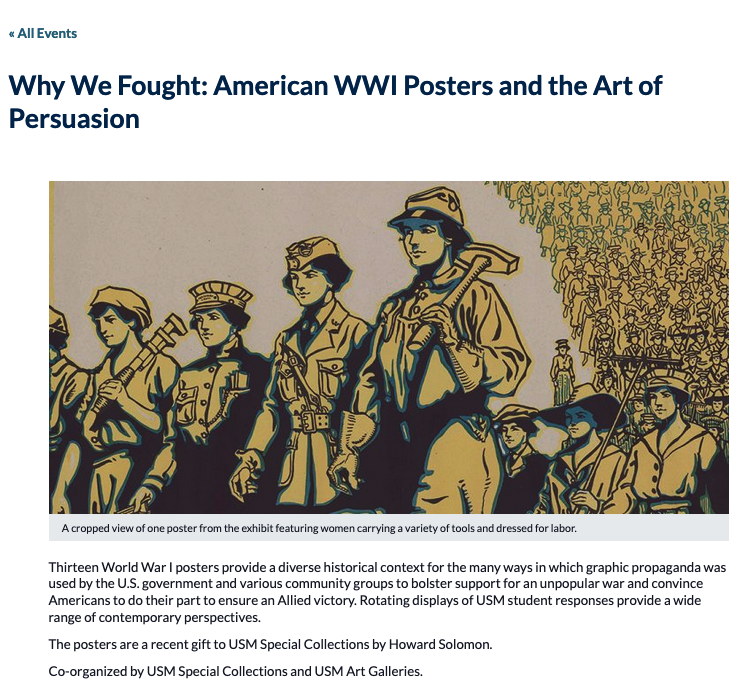
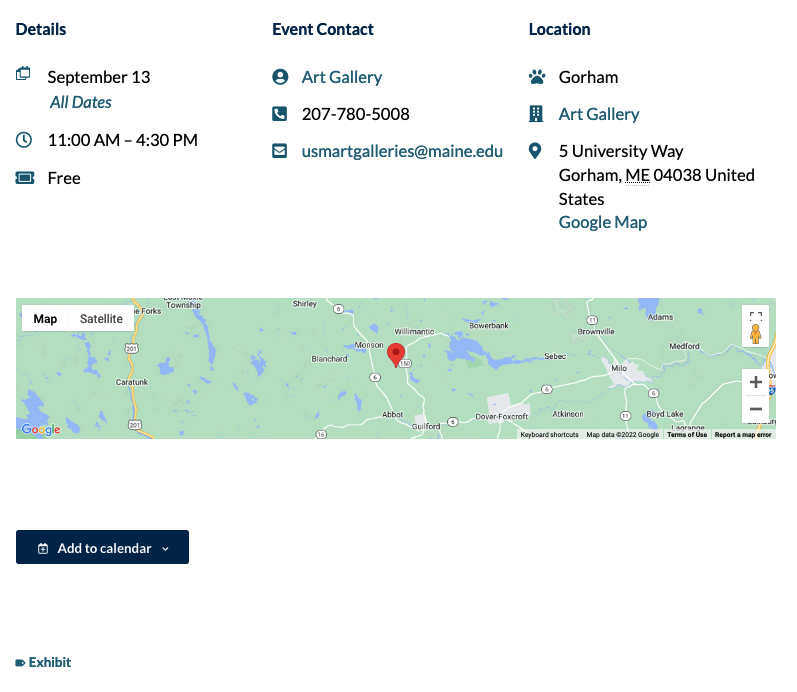
A robust events management suite of tools that enables user-driven search, listing, and filtering of campus events. Detail pages for each event are linked from various views such as list, day, week, month, location, photo, and summary sorting options. In the example below, the pay-for Filter Bar add-on is enabled and showing sample toggle-able extended (including custom) filtering options below the search bar. The event detail page is rich with event information and can include a button to register or sign up for the event. Both USM and UM use this suite of tools in their websites. Check out the Events Calendar DEMO site (which utilizes the Filter Bar plugin).
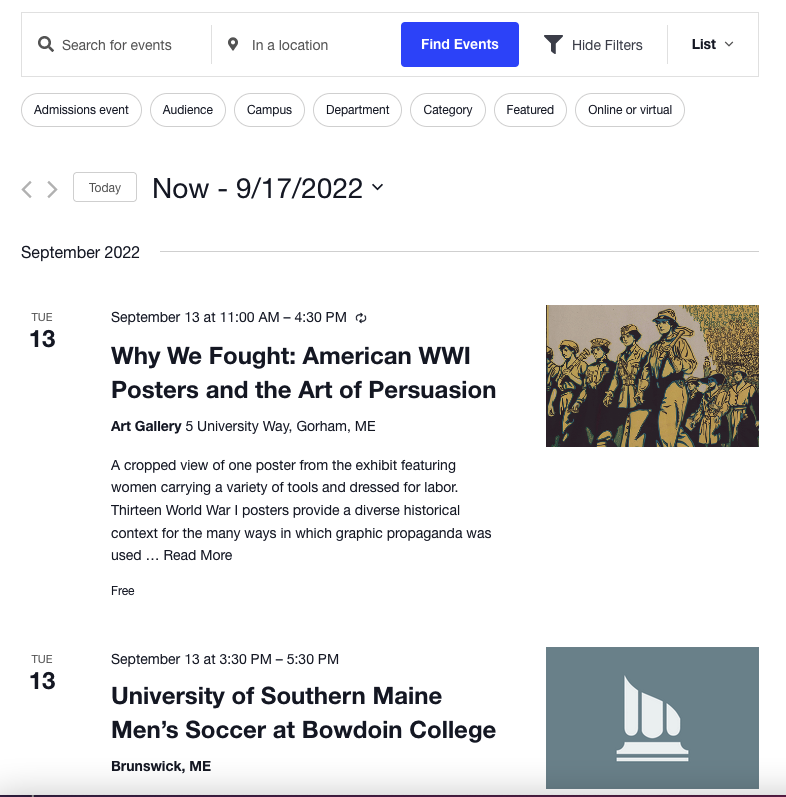
Sample event listing with filter bar (above).
Sample event detail page (below 2 images).
Some options and their correlated plugins require API keys and licensing fees. Only super admin can enable and configure several aspects of this feature. It’s best to approach the implementation of this feature as a collaborative effort between the campus web team and Web Technologies team.
Who Will Do What?
- Web Technologies will install the plugins and assist with initial configurations and setups.
- Campus Admins can adjust the Events settings, fields, labels, descriptions but should only make adjustment during the configuration and testing phases.
- Editors & Admins can create and edit event tags and events.
Plugins, Fees, Licenses, and Keys?
FREE or UMS-Provided Plugins:
- The Events Calendar Extension: Google Maps API Key Restrictions (If using locations with maps)
- The Events Calendar Extension: Relabeler (If default labels are not acceptable)
- Default Featured Image plugin (If a default image is needed when an event has none attached)
- The Events Calendar
- The Events Calendar PRO (Provided by UMS Web Technologies)
Campus-Provided Plugin and API Key Options:
- The Events Calendar: Filter Bar (If filter bar is needed, campus must purchase this add-on)
- A campus-specific Google Map API key is needed to display maps on the Event detail posts (a billing account is required by Google)
- An additional Google Maps API key for Geocoding API Restriction key is needed for filter bar w filter by location tagging enabled (a billing account is required by Google)
- Event Aggregator Add-On to Events Calendar PRO. campus purchases if they need to import event data regularly (e.g. daily from an external iCal feed).
Configure the Plugin and add-on license keys at: Events > Settings > Licenses tab. Configure the Google MAP API key(s) at: Events > Settings > Integrations.
Prepare your Request for the Events Feature
- First, you must identify or request creation of the sub-site where the (primary) Events repository will reside – e.g.: https://umf.maine.edu/calendar-of-events/. Note your site can not be called “Events” due to a current bug in the software.
- Meet with Web Technologies to plan the settings and display of Events feature.
- Purchase the Filter Bar plugin license, if the campus desires it.
- If not already existing, secure the Google Map API key(s) for the project and prepare to supply that with your request.
- Work with your primary campus Web Site Administrator to submit your request to webtech.support@maine.edu
- Web Technologies team will activate the plugins and feature and configure your desired options / fields to expose.
Determine and Configure Event Settings
After your Events site has been created and the plugins activated, decide on the settings for this feature. Go to Dashboard > Events > Settings. Some highlights to consider…:
- General tab – Most defaults are fine, however…:
- Hide “Recurring event instance settings” – leave unchecked, or some event instances will not appear in the listings.
- Decide on activating the Block Editor for Events.
- Clean up recurring events after X months – reduce to 3
- Create recurring events in advance for X months – reduce to 3
- Move to trash events older than – set to 1 year
- Permanently delete events older than – set to 1 year
- Optional: Miscellaneous settings > Events Manager – check to enable the Events Manager as the default page for viewing events.
- Timezone – select “Use the site-wide time zone everywhere” option and assure the time zone is set to “New York” at: Site Dashboard > Settings > General > Timezone.
- Display tab – Most defaults are fine, however…:
- Configure MAP settings, if utilizing it.
- Use the default event styles (not skeleton).
- Choose the Default Events Template from the “Events Template selector.” It provides the most room for events content display.
- Select among the available event views to be available.
- Date display / separator can be tweaked
- Labels can be changed if The Events Calendar Extension: Relabeler is activated. E.g. “Venue can be re-labeled “Location” (Web Tech can activate it for you)
- Date formatting is also handled under this tab.
- Additional Fields – custom event fields can be added to the Event post type.
- If Filter Bar is purchased / enabled, these custom fields can be used for filtering events.
- Example: “Online Event” checkbox; Target audience pull-down list; Campus pull-down list, etc.
- Filters tab – enable and configure various filters for the Filter Bar to display along with the Search bar.
**Filter Bar is a campus purchase and is prerequisite for the extended filtering capabilities of custom fields and positioning the filters along with the search form. - Imports – event data can be imported a number of ways. **Requires that the Event Aggregator add-on license has been purchased. There is a separate key for that.
- Accepts iCal, CSV, EventBrite, ICS, Google, etc
- You can set the home page of the site to be the “Main Events Page” of the Events Calendar under Settings > Reading.
- Note about sidebars: If sidebars are enabled for custom post types (under Theme Options > Custom Post Type Options), sidebars will not display on calendar views, nor on single event pages, but they will display on recurring event ‘series’ pages.
Populate the Event Taxonomies
We recommend Site Admins pre-populate the desired taxonomies with appropriate terms.
Event Categories: Common event types (or managed calendars) across campus. Exhibit, workshop, recreation, athletic
Venues: Consider entering common cities, stadiums, or buildings where any of your events might take place.
Organizers: Common sponsors, offices, or organizers of campus events.
Tags: Ad hoc tagging of events. Relevant disciplines, colleges, topics
Adding Events
Now you can add several events to assist in the creation and testing of Events before entering permanent data. Go to Events > Add New. There are pre-embedded blocks on the page for each of the event detail elements. Just fill them in and save the event. Event detail items can easily be duplicated when multiple items are desired. Attaching a feature image (always of the same dimensions) to each event is also advisable. This way, if events are shared across sites (e.g. with the UMS Post Picker), the images will display consistently.