- Overview
- Prepare your Request for the Directory Extension
- Manage Directory Departments & Hierarchy
- Add / Edit Directory Entries (Posts)
- Display the Directory Listing
Overview
The Directory feature provides a custom post type that can be displayed on a page in a list or grid layout. Directory is managed in (only) one site and departmental lists of entries from that site can be displayed on other sites using a shortcode. It is also possible to link to another resource within each person’s entry. An ideal use for this tool is to present names, titles and contact information for staff and faculty.
Though this tool is similar to the “People Listing” feature, Directory does not offer the auto-linked detailed profile pages for each person.<

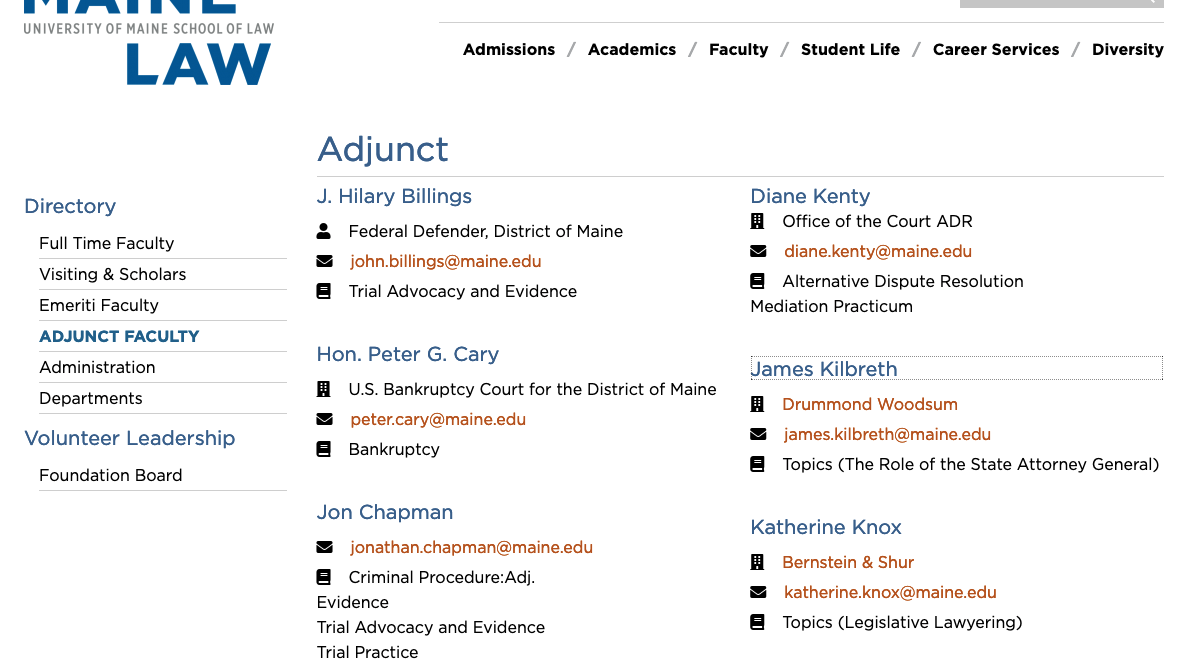
In this Directory example, Maine Law presents only Adjunct Faculty types on this page and other types on separate pages using the Directory Grid page template. Directory entries do not auto-link to a detailed profile page, though adding an external link to each entry is possible.
The icons used in the Directory display page are from v5 Fontawesome and can be changed to meet your needs. This would usually (and preferably) be added by Web Technologies team as part of your project style definitions.
Default fields available in this tool include:
- Full Name
- Organization Name / Organization URL
- Department Name
- Title
- Telephone
Prepare your Request for the Directory Extension
- First, you must identify or request creation of the subsite where the (primary) Directory structure and entries will reside – e.g.: “Faculty” subsite – https://usm.maine.edu/faculty/
- Decide which optional fields should be enabled for your Directory listings:
- Profile URL – Can link the person’s full name to an external resource / website (as in the example above).
- Address
- Courses
- Additional Information – A free-form field for additional information.
- Work with your primary campus Web Site Administrator to submit your request to webtech.support@maine.edu.
- Web Technologies team will activate the feature and configure your desired options / fields to expose in the site your team designates.
Manage Directory Departments & Hierarchy
Directory entries can be tagged as being assigned to specific “Departments.” Departments can have parents and a hierarchy can be created as in a College > Departments or Org. Unit > Department organizational structure. This way, specific lists can be displayed within different sites or pages.
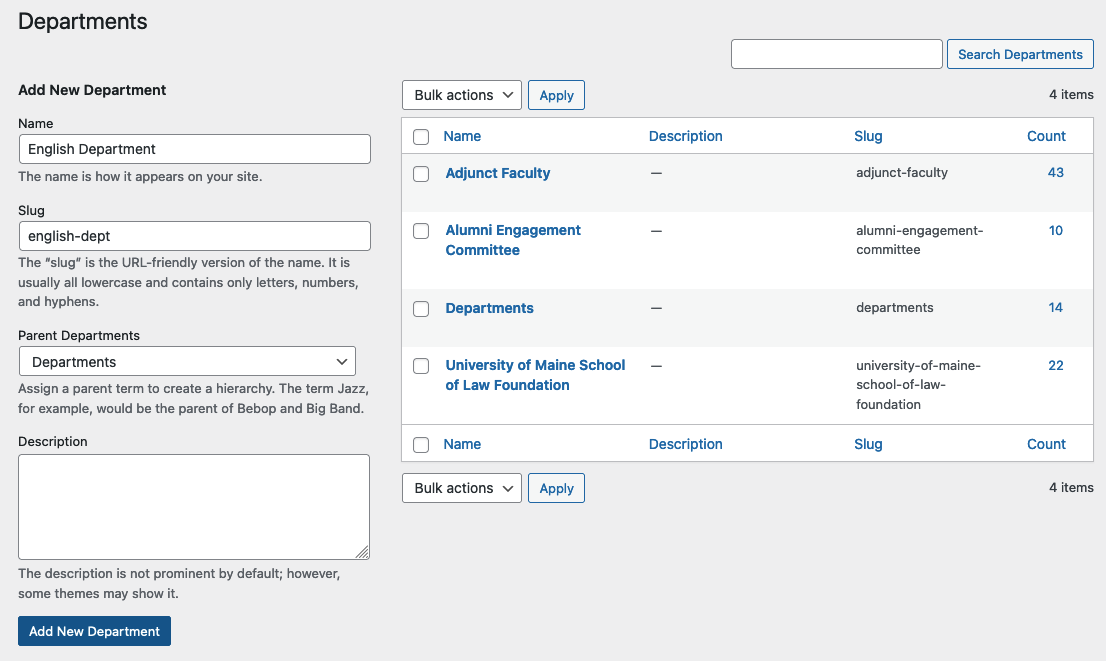
Go to your site Dashboard > Directory > Departments. This brings you to a screen with both the Add New Department form and the list of already-created Departments:

If you intend to share directory lists on many subsites, create your top-level / parent “Departments” first – e.g. Humanities, Science & Engineering, etc. Then, add the children Departments, being sure to select the Parent Department before completing the form with “Add New Department.” You may also want to have a consistent naming strategy for the department “Slug” field.
Edit existing Departments using the options below each in the departments list.
Add / Edit Directory Entries (Posts)
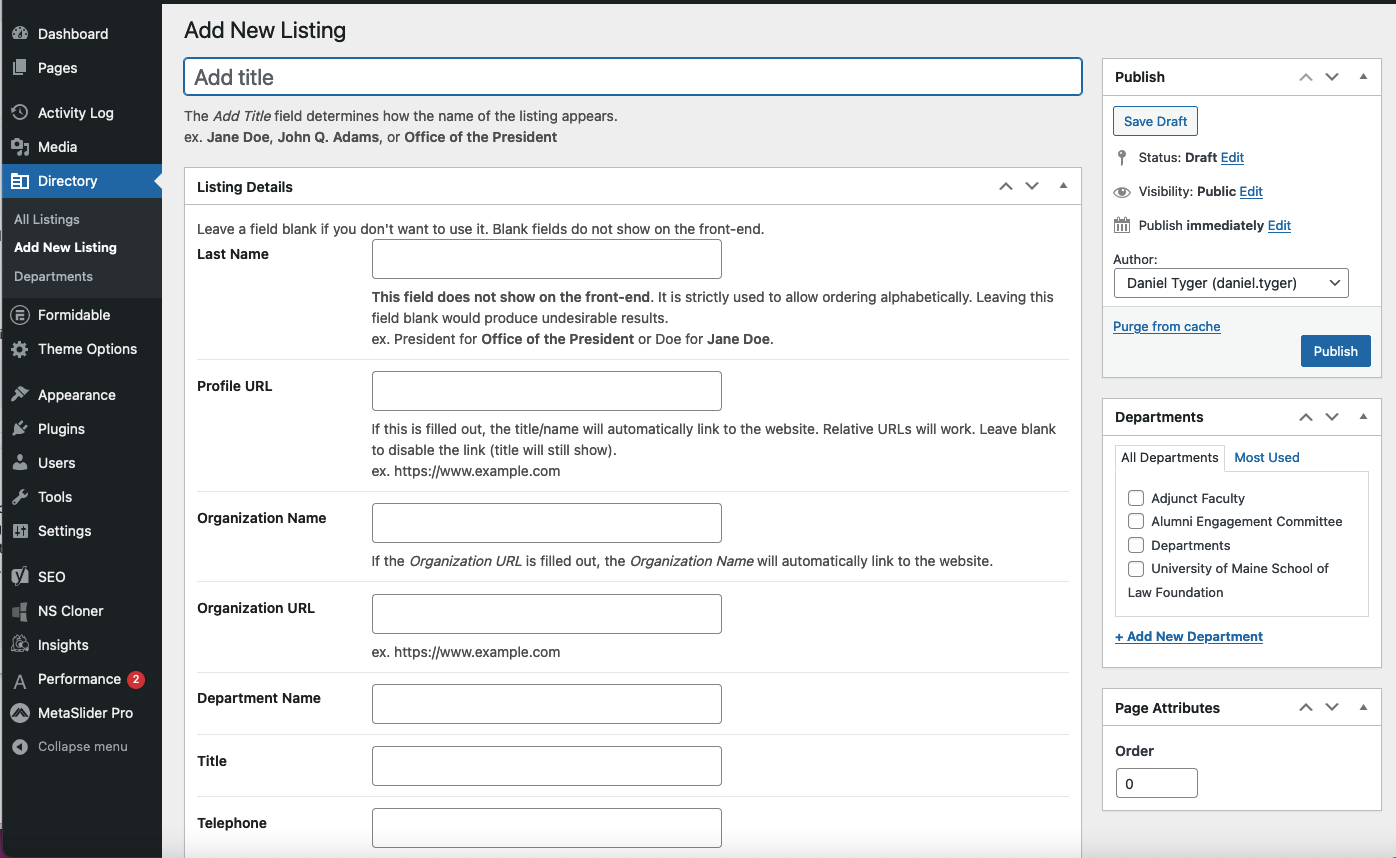
Add a New Entry: Go to your site Dashboard > Directory > Add New Listing.

Note the inline tips regarding the “Add title” and other entry fields.
To edit an existing entry, navigate to Directory > All Listings. Locate the person and choose Edit.
Display the Directory Listing
There are two ways to display a Directory listing on a page: using shortcodes or using the Directory grid page template.
You can use Directory shortcodes on any page or site, but the Directory Grid page template is only available within the site where Directory is activated.
Use the Directory Grid Page Template
- Create the page where you want the Directory Listing to show.
- Select the “Directory Grid” page template among the page attributes and save the page.
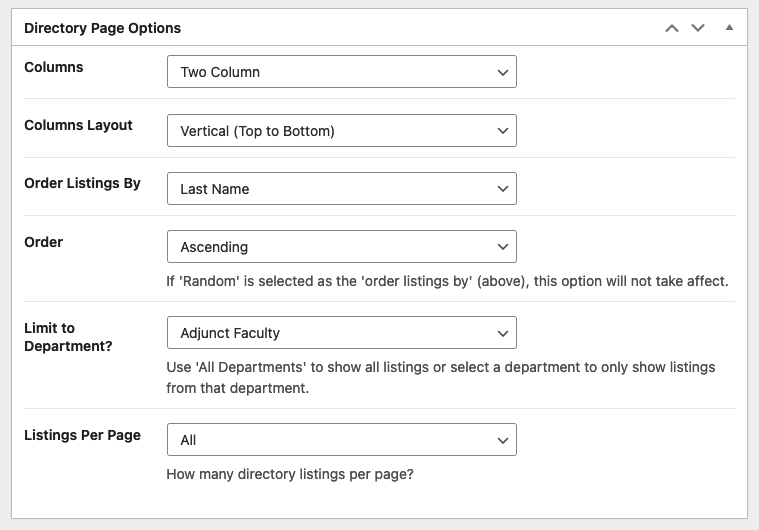
- Reload the same edit page screen. This will reveal specific fields under “Directory Page Options” section below the editing canvas. These are likely self-explanatory: number of columns, listing order, “All Departments” or limit to a single Department, etc.:
- After making all your choices save your changes and preview the display.

Display Directory Lists with Shortcodes
- The default shortcode is
. This will show all directory listings, regardless of department. The default shortcode is set to 2 columns with 50 listings showing in alphabetical order (using the listing title).
- You can change the default shortcode by adding attributes to it.
- If you want to show Directory Listings from a specific department, enter: directory_group=”{directory department slug}”
- From the dashboard, navigate to Directory > Departments.
- You will see a list of all departments, with their slugs. Look for the department you want to display, then paste between the quotes next to directory_group. It needs to be the slug, not the name for the attribute to work. For example, a department may be called “Student Life” but the slug would likely be “student-life”.
- Example:
.
- If you want start showing Directory Listings after a certain number of listings, enter: offset=”{number}”
- Let’s say you have a total of 8 listings, that you want to list by title in ascending order, but you want to skip the 1st listing and only show 7 listings.
- Example:
. This is start showing the listings from the 2nd listing. Because the default shortcode includes title and ascending orders, you don’t need to include these attributes. However, if you have more than 8 listings, and only want to show the first 7 (after skipping the 1st listing), you would add items=”7″ to your attributes.
- If you want to show Directory Listings from a specific department, enter: directory_group=”{directory department slug}”
Notes
- Use orderby=”last-name” to sort the listings alphabetically.
- Use orderby=”menu_order” to manually order the listings.
- Use items=”999″ (or a higher number) to show all available listings (based on your selections).
- Use order=”asc” if you want the list to be in alphabetical order, or order=”desc” if you want the list to be in reverse-alphabetical order.
- Use the Directory Listings to provide a list of offices for your campus.
Attributes
- orderby: menu_order, title, rand, last-name, date
- order: asc, desc
- department_group: department group slug (example: academics)
- offset: number to start with (example: 2, would start the listings from the 2nd listing based on other parameters).
- columns: 2, 3, 4
- columns_layout: vertical, horizontal
- source_site_id: subsite id, current
- items: a number of how many items to show (example: 8)