- Overview
- Form and Data Security Requirements
- Request the Forms Functionality
- Adjust Global Settings
- Manage Styles
- Import / Export Functionality
- Create the Form
- Publish the Form
- Collecting Entries
- Views
- Limiting File Types on Upload Field
- Additional Detailed Tutorials from Formidable
Overview
UMS currently supports Formidable Forms PRO – a robust, feature-rich, vendor-supplied forms management plugin. In most cases, the basic form and notifications functions meet the campus needs for various form types, question types, and configurations. We’ll only cover enough basics here to get you started with those features. If you have detailed questions or a complex problem to solve with forms that may require “Add-Ons” or extended features, please submit your issue through the support system or by emailing webtech.support@maine.edu and we will explore the special need(s) with you.
Form and Data Security Requirements
Due to the security risks associated with collecting and storing user-submitted data, website business owners should carefully consider how they use web forms. You are responsible to abide by the UMS WordPress Web Form Data Collection policy guidance and recommendations summarized here and demonstrated in later sections of this document, where appropriate…:
- Monitor all sites with forms and be aware of any settings a local site administrator may have configured that break policy.
- Use only the email option for forwarding submissions to designated emails whenever possible.
- File Upload field type should not be used, as the user’s uploaded file will be publicly available. If it must be used, it is highly recommended that it be limited to specific file types.
- If collecting data entries is important, you must abide by the UMS Administrative Practice Letter “Employee Protection of Data” and periodically export and delete the form entry data from WordPress regularly or consider other alternatives (e.g. Google Forms)
Request the Forms Functionality
Forms are not enabled by default in every site. If “Forms” (or “Formidable”) is not listed in the site dashboard menu, you will need to request the feature to be enabled.

Include the need for forms in any site request, or to enable it in an existing site, send an email to: webtech.support@maine.edu including the campus and sub-site that needs forms activated. Meanwhile, consider what types of information you will be collecting from users. Preparing the questions and each possible answer in a document may make it easier to build the form, once the feature is enabled.
Adjust Global Settings
Navigate to Forms > Global Settings. Most default settings are fine or pre-set by the Web Technologies team when they enable the feature. However, you may want to adjust Permissions to allow only specific roles to access certain actions. The defaults are for only the Administrator role to manage all functions.

The example above shows that the Editor role can view forms, entries, and reports in this site.
Change the name of the forms feature in the Dashboard listing menu item (default = “Formidable”) in the “White Labeling” section of the Global Settings In this example, the Administrator changed “Formidable” >> “Forms.”

We recommend using ReCaptcha on public forms receive a lot of spam / anonymous entries. Review this ReCaptcha guide from Formidable if this is new to you. Web Technologies can set this up for you if you do not already have a Google ReCaptcha API key. Let us know if you’d like some assistance.

Manage Styles
Often, campuses wish to influence some of the default styles after the Forms feature is enabled. Navigate to Forms > Styles. Alter the default style and save it or create new ones. In the example below, UMA team did alter several styles to more seamlessly match their style guide. A preview of a sample form provides the visual changes as you change various settings and save them. They altered some font types, colors and sizes in a few areas they intended to use in their forms.

Import / Export Functionality
Forms, Entries, Views, and Styles can all be exported / imported in XML or CSV formats among the sites you manage. Save time with this feature if forms will be used in multiple sub-sites of your web. We recommend carefully naming your custom style(s) to make them easier to recognize and select when using forms across multiple sub-sites.

Create the Form
Now, we’re ready to create the form(s). Navigate to Formidable (or your assigned plugin name) > Forms. Use the “Add New” to enter the form creation canvas. Choose the “Blank Form,” option. Give the form a smart name and click the “Create” button to enter the form authoring environment.

This is the Build screen. Note the many question types (Add Fields tab) and the convenient drag n’ drop interface for adding fields to your form. After adding fields to the form, you can click on each field and make any needed adjustments in Field Options tab area.
Remember to discourage the use of “File Upload” field, due to security concerns, as shown in the graphic above. WordPress saves form file attachments to a world-readable directory, which exposes any submitted information in the document.
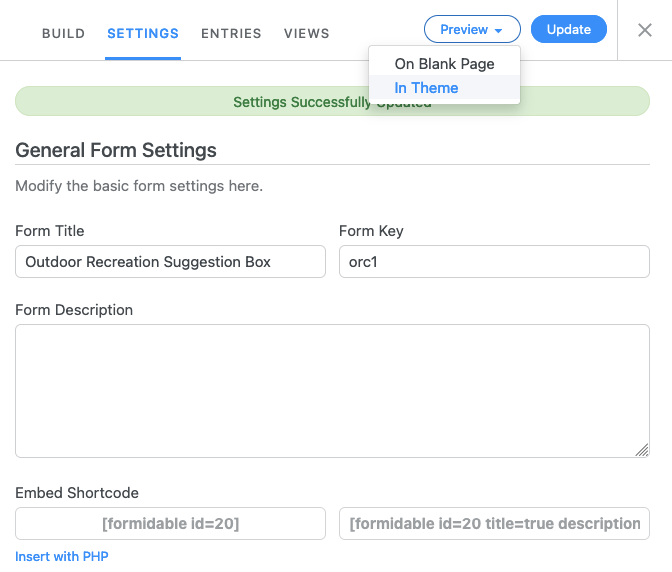
Navigate to the Settings area. The General Form Settings appear first. Most options are self-explanatory, but we’ll highlight a few key points.

Select the checkbox “Do not store entries submitted from this form” unless you fully understand the ramifications of storing user-submitted data to this site. Set up your form submission notifications. This is how submitted form data will be delivered to the individual(s) in charge of managing the solicited data. Navigate to the Settings > Actions & Notifications section.

Select Send Email and configure the recipients, etc. Other Form Actions are not supported at this time.
Publish the Form
Preview your form before publishing. There are two ways to expose your form to your website.
Method 1: Publish with a Formidable Forms Block
This guide for adding a Formidable form to an editable region using a Formidable Forms block explains the steps well.
Method 2: Via Shortcode
Copy the shortcode of the form ready for publishing from the Forms list view or from the form’s Settings > General Settings screen (e.g. “[formidable id=20]”).

Use the Shortcode block to insert the form into any editable area, as appropriate.

Enter the form’s shortcode into the shortcode block. Save and Publish the page.

Collecting Entries
Earlier for security reasons, we recommended using the email method of data collection, where specific recipients receive the submitted form data. In most cases, then, “Entries” for any given form should be empty.
Views
We do not currently support any custom Views so this area will be blank by default and may be ignored.
Views are only used to create custom views of form data collected. No campus has used this feature yet, since the default form collection of entry data has been sufficient for most needs.
Limiting File Types on Upload Field
In cases where the Upload field must be used, it should be limited to only accept expected file types. For example, if the form is an application to a grant or award and requires an essay, only PDFs, DOCs, DOCXs, etc. should be allowed.
In the Build tab, click on the upload field to open the Field Options.
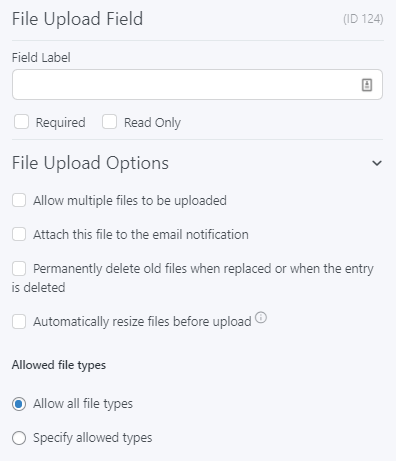
Under Allowed file types, select “Specify allowed types”.
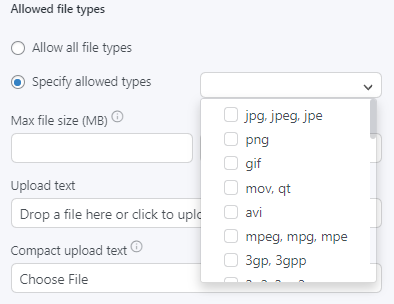
Check the file types that should be allowed. Once these settings are set, be sure to update the form.