Add Users to your Site
- Go to the Dashboard of the subsite the users should have access to
- Click Users on the left Dashboard menu
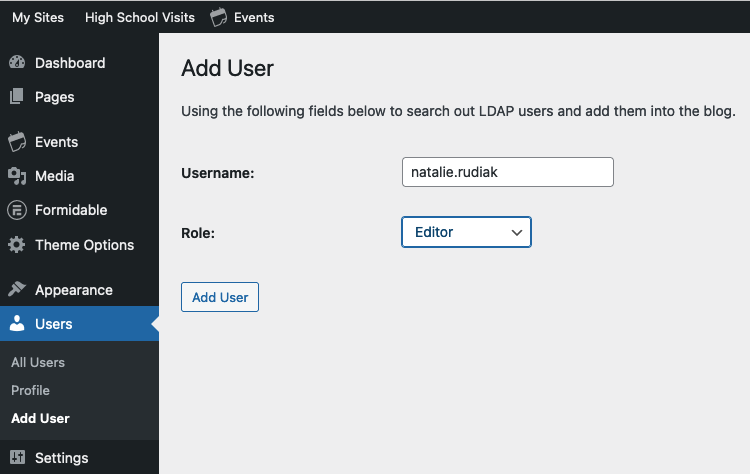
- Then click Add User on the left, as shown in the screenshot below
- There is also an Add New button at the top, but that will not work for these sites. This unfortunate point of confusion exists because the plugin that allows maine.edu logins in WordPress only links to the left button.

Assign a Role to the User
Next, on the Add User screen, enter the username of the user (the email address without the @maine.edu) and set their Role, which determines the level of permission. For a more thorough explanation of permissions, you can also read the official WordPress documentation on Roles, but the short version is:
- Administrator is the most powerful role, allowing access to change all content, add/remove users, and modify site-wide settings for themes and plugins. This role has the ability to change (and potentially break) the site’s appearance or functionality, so a campus usually has only one or two Administrators.
- Super Editor custom UMS role that grants additional rights to the Editor role to allow for managing theme options, managing users (list, delete), and access to unfiltered html when editing.
- Editor role can change any content on the site and does not have access to theme or plugin settings. Most users on campuses, such as those editing content on a department site, have this role.
- Other roles: not frequently used on our sites
- User Roles and Capabilities in the official WordPress documentation